
Invite Your Team and Assign Roles
Give each person their own sign-in, with only the access their job needs.
For owners and administrators who manage who can use opsentric and what they can do
On this page
Invite people from Administration → Users and choose their role when you invite them. A role is a set of permissions, so check what it allows rather than going by its name.
Before you invite anyone
Open Administration → Users. The Active users list shows everyone in your organization, and the heading shows seat usage. Paid Basic and Pro subscriptions include one seat and let you purchase additional seats; the trial has five total seats, including the owner.
What you can do here depends on your permissions:
- Manage members lets you invite people, change their role, and remove them.
- Edit member profiles lets you change names, phone numbers, and working hours, but not add or remove anyone.
- Manage roles lets you create and edit custom roles under Administration → Roles, if your plan includes custom roles.
Owners and admins have all of these. If you’ve used every seat, remove someone who has left or ask someone with billing-management access to increase your subscribed seat count before inviting another person. Pending invitations reserve seats too; see pricing.
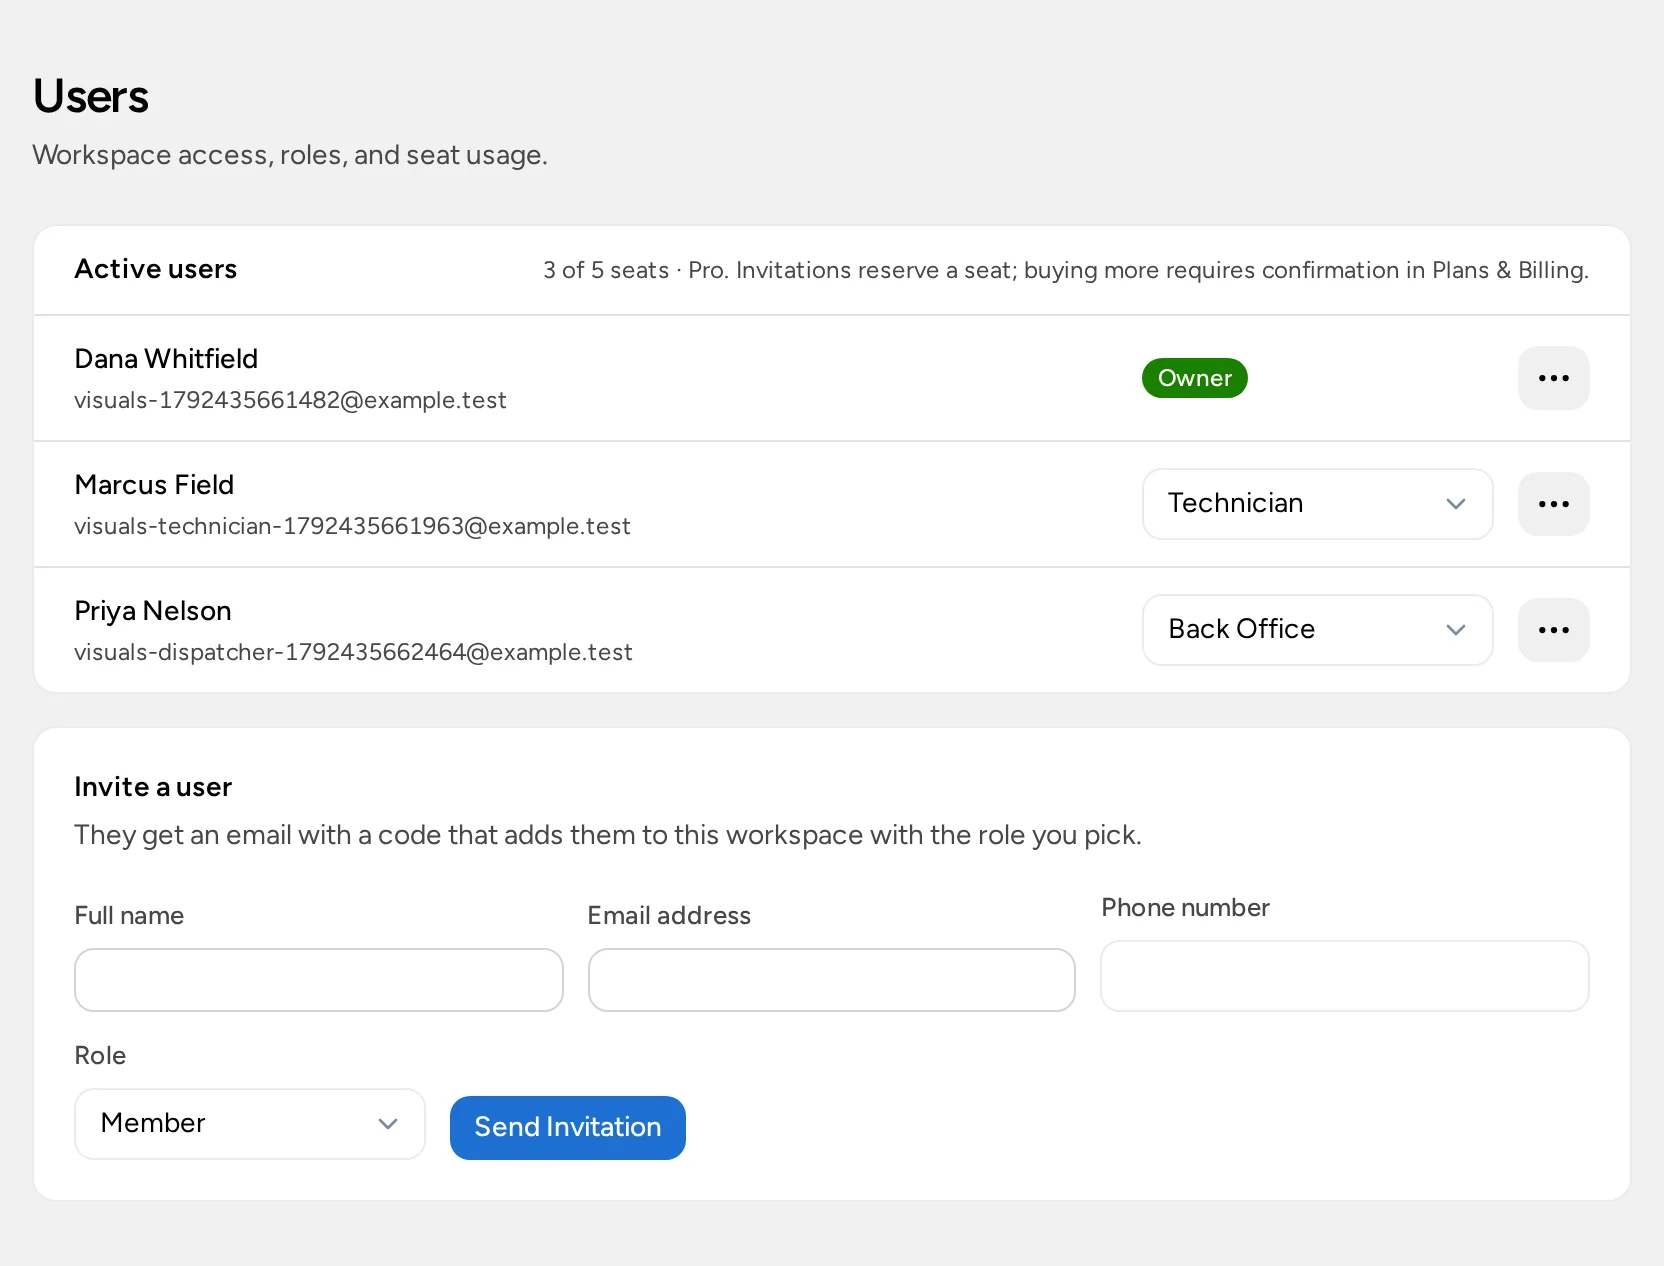
Invite someone
- Under Invite a user, enter their Full name and Email address. Phone number is optional.
- Choose a Role. The next section explains the choices, and you can change it later.
- Select Send Invitation.
Opsentric emails them a six-digit code, and they appear in the list with an Invitation pending badge until they accept. The code lasts seven days. If it expires or they can’t find the email, open the menu on their row and select Resend invitation to send a new code.
The invitation only works for an email address that doesn’t already have an Opsentric account. Each account belongs to one organization, so someone who already uses Opsentric elsewhere needs a different email address for yours.
What the invited person does
- They open the invitation email and follow its link.
- On Enter Your Invitation Code, they check their Email address, enter the six-digit Invitation code, and select Continue.
- They see your organization’s name and logo. They set a Password of at least 8 characters, enter it again in Confirm password, and select Accept Invitation.
They can then sign in and see the pages their role allows. The Invitation pending badge disappears from your list.
Choose the right role
Every person has one role. Opsentric has three standard roles:
- Owner is the person who created the organization. The owner has full access and can’t be changed or removed from this screen.
- Admin has full access except transferring ownership. Only owners and admins can make someone an admin.
- Member is the default for new people. It can view the ledger and finance dashboard and upload receipts, but can’t change customers, invoices, or the schedule.
Opsentric also includes ready-made roles, marked Built-in on the Roles screen. Some depend on your plan and settings:
| Role | Suits | Can do | Available when |
|---|---|---|---|
| Technician | Field staff | Manage customers and invoices, see and work their own visits, upload receipts, work their own leads. No ledger access. | Your plan includes Field Service |
| Back Office | Dispatchers and office staff | Manage customers, invoices, the item catalog, the schedule, and all leads; upload receipts. | Your plan includes Field Service |
| Sales Representative | Estimators and sales staff | Manage customers, quotes, and all leads; see and work their own sales visits; upload receipts. | Field Service with the Sales & Service structure |
| Manager | People managers | Manage customers, invoices, and leads; edit member details and working hours; approve time off; upload receipts. | Any plan |
If none of these fit, create a custom role (below) or adjust a built-in one. A role’s name doesn’t limit what it does. For example, a role called “Office” doesn’t let someone send invoices unless it includes Manage invoices.
What each permission allows
| Permission | What it allows |
|---|---|
| Manage customers | Create and edit customers. |
| Manage invoices | Create quotes and proposals, send invoices, and record payments. |
| Manage catalog | Create and edit items. |
| Manage leads | Create, assign, and work every lead. |
| View own leads | Create and work their own leads and the unassigned pool, without seeing the full pipeline. |
| View finance | See income, expenses, and the finance dashboard. |
| Upload receipts | Upload receipts and see the ones they uploaded, without ledger access. |
| Manage finance | Create and edit transactions, receipts, and categories. |
| Manage schedule | Create and assign appointments. Field Service only. |
| View own schedule | See appointments assigned to them. Field Service only. |
| Assignable to jobs | Can be assigned field-service visits. Field Service only. |
| Bulk import | Import customers and items from CSV files. |
| Manage members | Invite and remove people. |
| Edit member profiles | Edit member details and working hours. |
| Manage time off | Approve and deny time-off requests. |
| Manage roles | Create and edit custom roles. |
| Manage settings | Edit organization settings. |
| Manage billing | Change the plan and billing. |
Plans with premium support also offer Manage support, for filing support tickets.
Create or edit a custom role
Custom roles need a plan that includes them and the Manage roles permission.
- Open Administration → Roles and select New Role. To change an existing role, select it in the list.
- Enter a Role title, such as “Dispatcher”.
- Tick the permissions this role should have. They’re grouped under Customers & Invoices, Finance, Scheduling, and Administration.
- If your organization uses the Sales & Service structure, choose the Appointment Specialties this role can be assigned: sales visits, service visits, or both.
- Select Save Role.
A few rules apply:
- You can’t give a role a permission you don’t have yourself.
- A custom role replaces the Member defaults rather than adding to them. If people in the role should upload receipts or see the ledger, tick those permissions too.
- Changes apply to everyone who has the role.
- Delete Role only works once nobody is assigned to it. Move people to another role first.
Change someone’s role or remove them
To change a role, choose a new one from the dropdown on the person’s row in Active users. The change takes effect straight away. You can’t change your own role or the owner’s.
When someone leaves, open the menu on their row and select Remove from workspace, then confirm. They’re signed out on every device and can no longer access your organization. Their past work, such as invoices they created, stays in place. Before removing them, reassign any leads or upcoming visits that are theirs.
Edit details and working hours
Open the menu on a person’s row and select Edit details and hours. You can change their Display name, Phone number, and Working hours, then select Save Member.
Working hours tell schedulers when someone is normally available. A No working hours badge on a row means they haven’t been set yet. Each person can also set their own under Me → My Profile → Availability.
Someone with only Edit member profiles can edit people on the standard Member role. Owners and admins can edit anyone except that admins can’t edit the owner.
Approve time off
People request time off under Me → My Profile → Availability. To review requests, you need Manage time off.
- Open Me → My Profile → Availability and switch to Team.
- Under Pending Approval, read each request.
- Select Approve or Deny.
If the request overlaps visits already booked, Opsentric warns you before approving. Approval doesn’t move those visits. They show up in Scheduling’s Needs Attention for someone to reassign.
People who manage the schedule can see when someone is away, but not the reason or type of leave. Only people with Manage time off see those details.
If your screen looks different
Users or Roles is missing from Administration
Users needs Manage members, Edit member profiles, Manage settings, or Bulk import. Roles needs Manage roles and a plan with custom roles. Ask your organization’s owner.
A built-in role isn’t in the dropdown
Technician, Back Office, and Sales Representative need Field Service. Sales Representative also needs the Sales & Service structure. You also won’t see roles that include permissions you don’t have.
The invitation email didn’t arrive
Check the address on their row, ask them to look in spam, then use Resend invitation. Each resend sends a new code.
Someone can’t do part of their job
Open Administration → Roles and check which permissions their role actually has. Many tasks need two permissions. For example, pricing a lead’s proposal needs Manage invoices as well as lead access.