
Create and Send a Customer Invoice
Prepare the customer's quote, send the invoice when it's ready, and keep track of what they've paid.
For business owners and staff who manage customer invoices
On this page
Save a quote first, then issue it with or without email. Record money already received separately from payments collected through online checkout.
How invoices work
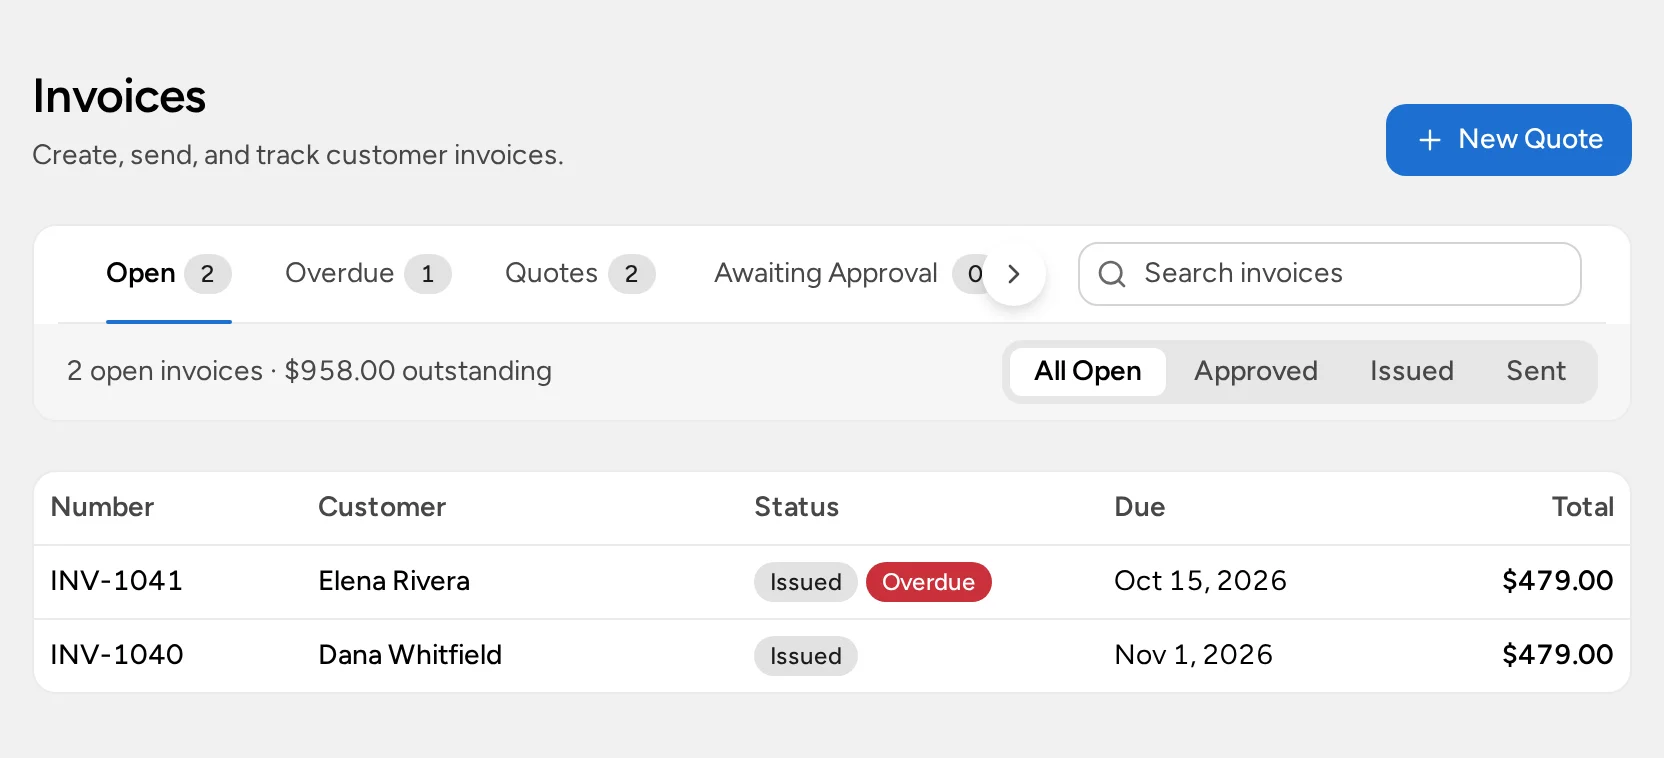
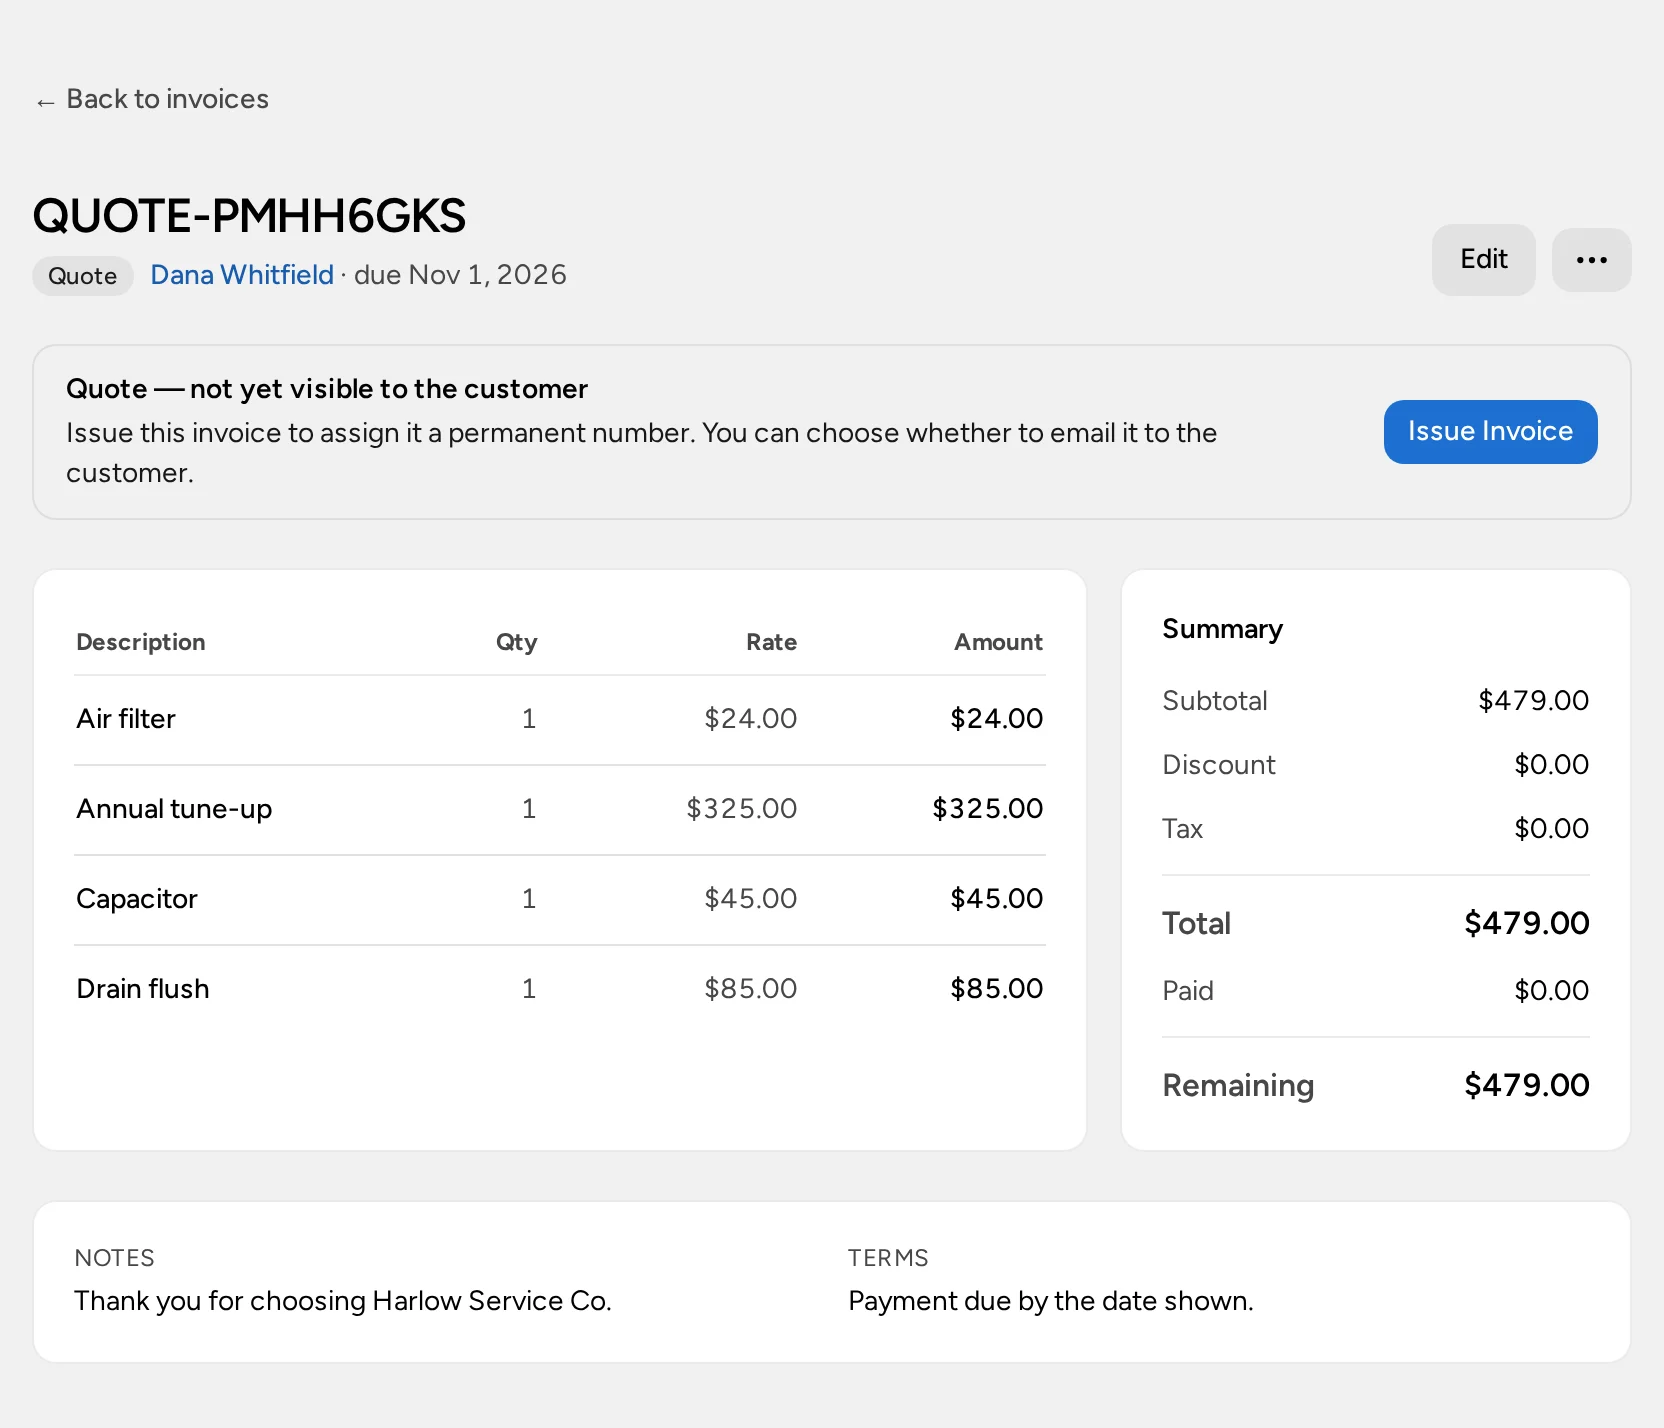
Every invoice starts as a quote: an editable draft with a temporary QUOTE- number that the customer hasn’t been sent. When you issue it, it gets a permanent INV- number and can be emailed, approved, and paid.
You need Manage invoices for everything in this guide.
Create the draft quote
If the customer wants to compare options first, prepare a proposal and build the quote from the option they choose.
- Open Invoices and select New Quote.
- Choose the customer. If they’re new, create them first.
- Check the Service location if shown. It sets the default tax rate.
- Check the Issue date and Due date. New quotes default to today and 14 days later.
- Add lines with Item Catalog or Add line item. Check each line’s Description, Qty, price, and Tax %. See Build Your Products and Services Catalog.
- Add Notes and Terms. The customer sees both.
- Choose the approval and deposit terms (below), then select Save Quote.
Taxable catalog items use the location’s tax rate, or your organization’s default. If you type a line’s Tax % yourself, that line keeps your rate.
Choose approval and deposit terms
- Requires customer approval: the customer must approve before they can pay. Quotes started from a visit have this ticked.
- Required deposit: No deposit, Fixed amount, or Percentage of the total including tax. Customers can pay a deposit even when partial payments are turned off.
Setting a deposit doesn’t charge the customer. Partial payments are an organization setting: Allow partial payments on invoices.
Invoice a service plan visit
For a completed visit on a per-visit service plan, select Create Invoice on the appointment, or use Service Plans → Needs Invoicing. The draft starts with the plan name, service date, and plan price. See bill the plan.
Issue the invoice, with or without email
- On the saved quote, select Issue Invoice, or Send for Approval if approval is required.
- Leave Send invoice by email ticked to email it now, or clear it to issue without email.
- Select Issue Invoice.
The status then shows:
- Issued: issued, not emailed yet.
- Sent: the email provider accepted the message. It doesn’t mean the customer read it.
- Awaiting approval: waiting for the customer to approve.
Later, use Send Invoice, Send Approval Request, or Send Payment Reminder from the invoice. Nothing is sent automatically. Email History shows each attempt. If a result is Unknown, ask support before sending again.
For a visit’s invoice, you can tick Include the post-work summary to send it in the same email. Use Preview Summary first.
Check what the customer sees
From the actions menu, choose Open Customer View, Copy Customer Link, or Download PDF. Anyone with the link can open the page, so treat it as private.
If approval is pending, the customer selects Approve or Decline on that page. For a customer standing next to you, select Approve In Person, confirm the signer, and let them sign on your device. Approval Details records who approved and how.
Record money you’ve already received
Use this for cash, checks, your own card terminal, or bank transfers. It records the payment; it doesn’t charge anyone.
- Open an issued or approved invoice and select Collect Payment.
- Choose Full balance, Deposit, or Partial, and the amount.
- If online payments are set up, choose Other.
- Choose the Payment method, Payment date, and Income category. Add a Reference (optional), such as a check number.
- Select Record Payment.
This creates the income transaction in the ledger. Don’t add another one for the same payment.
Collect a payment online
Online payments need a connected Stripe account. See Connect Stripe for Customer Payments.
- On your device: select Collect Payment, choose the amount, choose Stripe Checkout, then Continue to Checkout and let the customer pay.
- From the customer’s link: the customer selects Pay Invoice, chooses Pay Balance, Pay Deposit, or Partial Payment, and then Continue to Payment.
The payment is recorded only after Stripe confirms it. Check the balance before recording anything by hand.
Correct or cancel a document
- Edit works until a payment is recorded. Editing an invoice that needs approval sends it back to Awaiting approval as a new revision. Send it again yourself; saving doesn’t email anyone.
- Void Quote or Void Invoice cancels an unpaid document but keeps the record. It isn’t a refund. Documents with recorded payments can’t be voided.
Schedule the work an invoice covers
With Field Service and Manage schedule, an invoice can book visits once its approval and deposit requirements are met. Select Schedule Service to book the first visit, and Schedule Another Visit for more. Each visit takes the invoice’s customer and location. Scheduling doesn’t change the invoice or record a payment. See the scheduling guide.
If your screen looks different
The quote won’t save
Choose an active customer, add at least one complete line, and check the dates and deposit.
The email failed after issuing
The invoice already has its permanent number. Check Email History and the customer’s address, then send it again from the same invoice. Don’t create a new one.
Collect Payment or Stripe Checkout is missing
The invoice must be issued, have a balance, and be approved if approval is required. For Stripe Checkout, Administration → Payments must show Ready.
Checkout finished, but the balance hasn’t changed
Refresh the invoice. If Payment History shows Processing or Requires Review, select Recheck Payment rather than starting another checkout. See If checkout isn’t available.