
Set Up Pest Control Scheduling and Billing
Move from a reported problem to an inspection and a priced next step without mistaking a lead for a treatment visit.
Published
On this page
A caller may say they found activity in a kitchen, but that isn’t a treatment plan. Meanwhile, travel and supplies have to be accounted for even when an inspection has not yet become a paid job. First identify the property, arrange an inspection where needed, and agree on scope before billing. Opsentric helps organize those business handoffs. It is not a pest identification tool, pesticide application log, or compliance system.
Where inspection requests lose momentum
- The report, work site, and paying customer are different pieces of information. Customer and service-location records distinguish the manager from the unit to inspect. A lead preserves what was reported without presenting it as a diagnosis.
- An inspection finishes without a clear next contact. A lead follow-up gives the office a date to check the customer’s decision. Any agreed return visit gets its own booking and assignment rather than being assumed from the inspection status.
- A field purchase and a customer payment get confused. Receipts support expense review; invoice payments show money received. Neither is a pesticide application record, and a completed inspection does not make its invoice paid.
Set up your organization before taking inspection calls
- Confirm business identity and permanent defaults. Enter the name and contact details customers should see, then check country and Time zone. Review Organization currency, Starting number, and Padding width before creating the organization; you cannot change currency or invoice-numbering choices afterward.
- Choose how visits reach the technician. Self Scheduling offers personal time blocks; Basic or Pro with the Field Service add-on supports assigned visits at customer sites. Decide who manages schedules, quotes and invoices, receipt uploads, and finance review. Follow the first-workday checklist so field access does not imply access to all financial records.
- Set up Stripe to accept credit card payments. After workspace creation, a person with settings-management access opens Administration → Payments and selects Connect With Stripe when available. Finish provider onboarding, check Accept customer payments and Receive bank payouts separately, select an active Online payment income category, and choose Save Income Category. Your Opsentric subscription payment is a separate transaction, not merchant setup. Use the Stripe connection guide before offering checkout on an inspection or service invoice.
Start with the reported location
Add the homeowner or facilities contact as a customer. For a landlord with multiple units or buildings, confirm the precise service address and add it as a service location when your Field Service access allows. Keep billing details separate from the site. Avoid putting tenants’ private details in a general property note if they aren’t needed for the visit.
Create a Lead for the reported issue. Note what the caller actually observed, when it happened, and who will follow up; don’t record an unverified species or promise a treatment result. An inspection request can remain open while you gather information. The lead guide explains status and follow-up, neither of which books a technician automatically.
If the report came from a tenant while a manager pays the bill, confirm who will authorize inspection and who should receive the invoice. Record the unit or building for scheduling without copying unnecessary tenant details into customer-facing invoice notes. A separate report at another property needs its own lead or follow-up, even when the same manager calls about both.
Before promising a treatment price, distinguish the caller’s description from what has been inspected. For example, “marks near the pantry” is a report to investigate, not a verified identification. Set the next contact date while the inspection is being arranged so the office can find requests that have gone quiet.
Schedule an inspection, then any return work
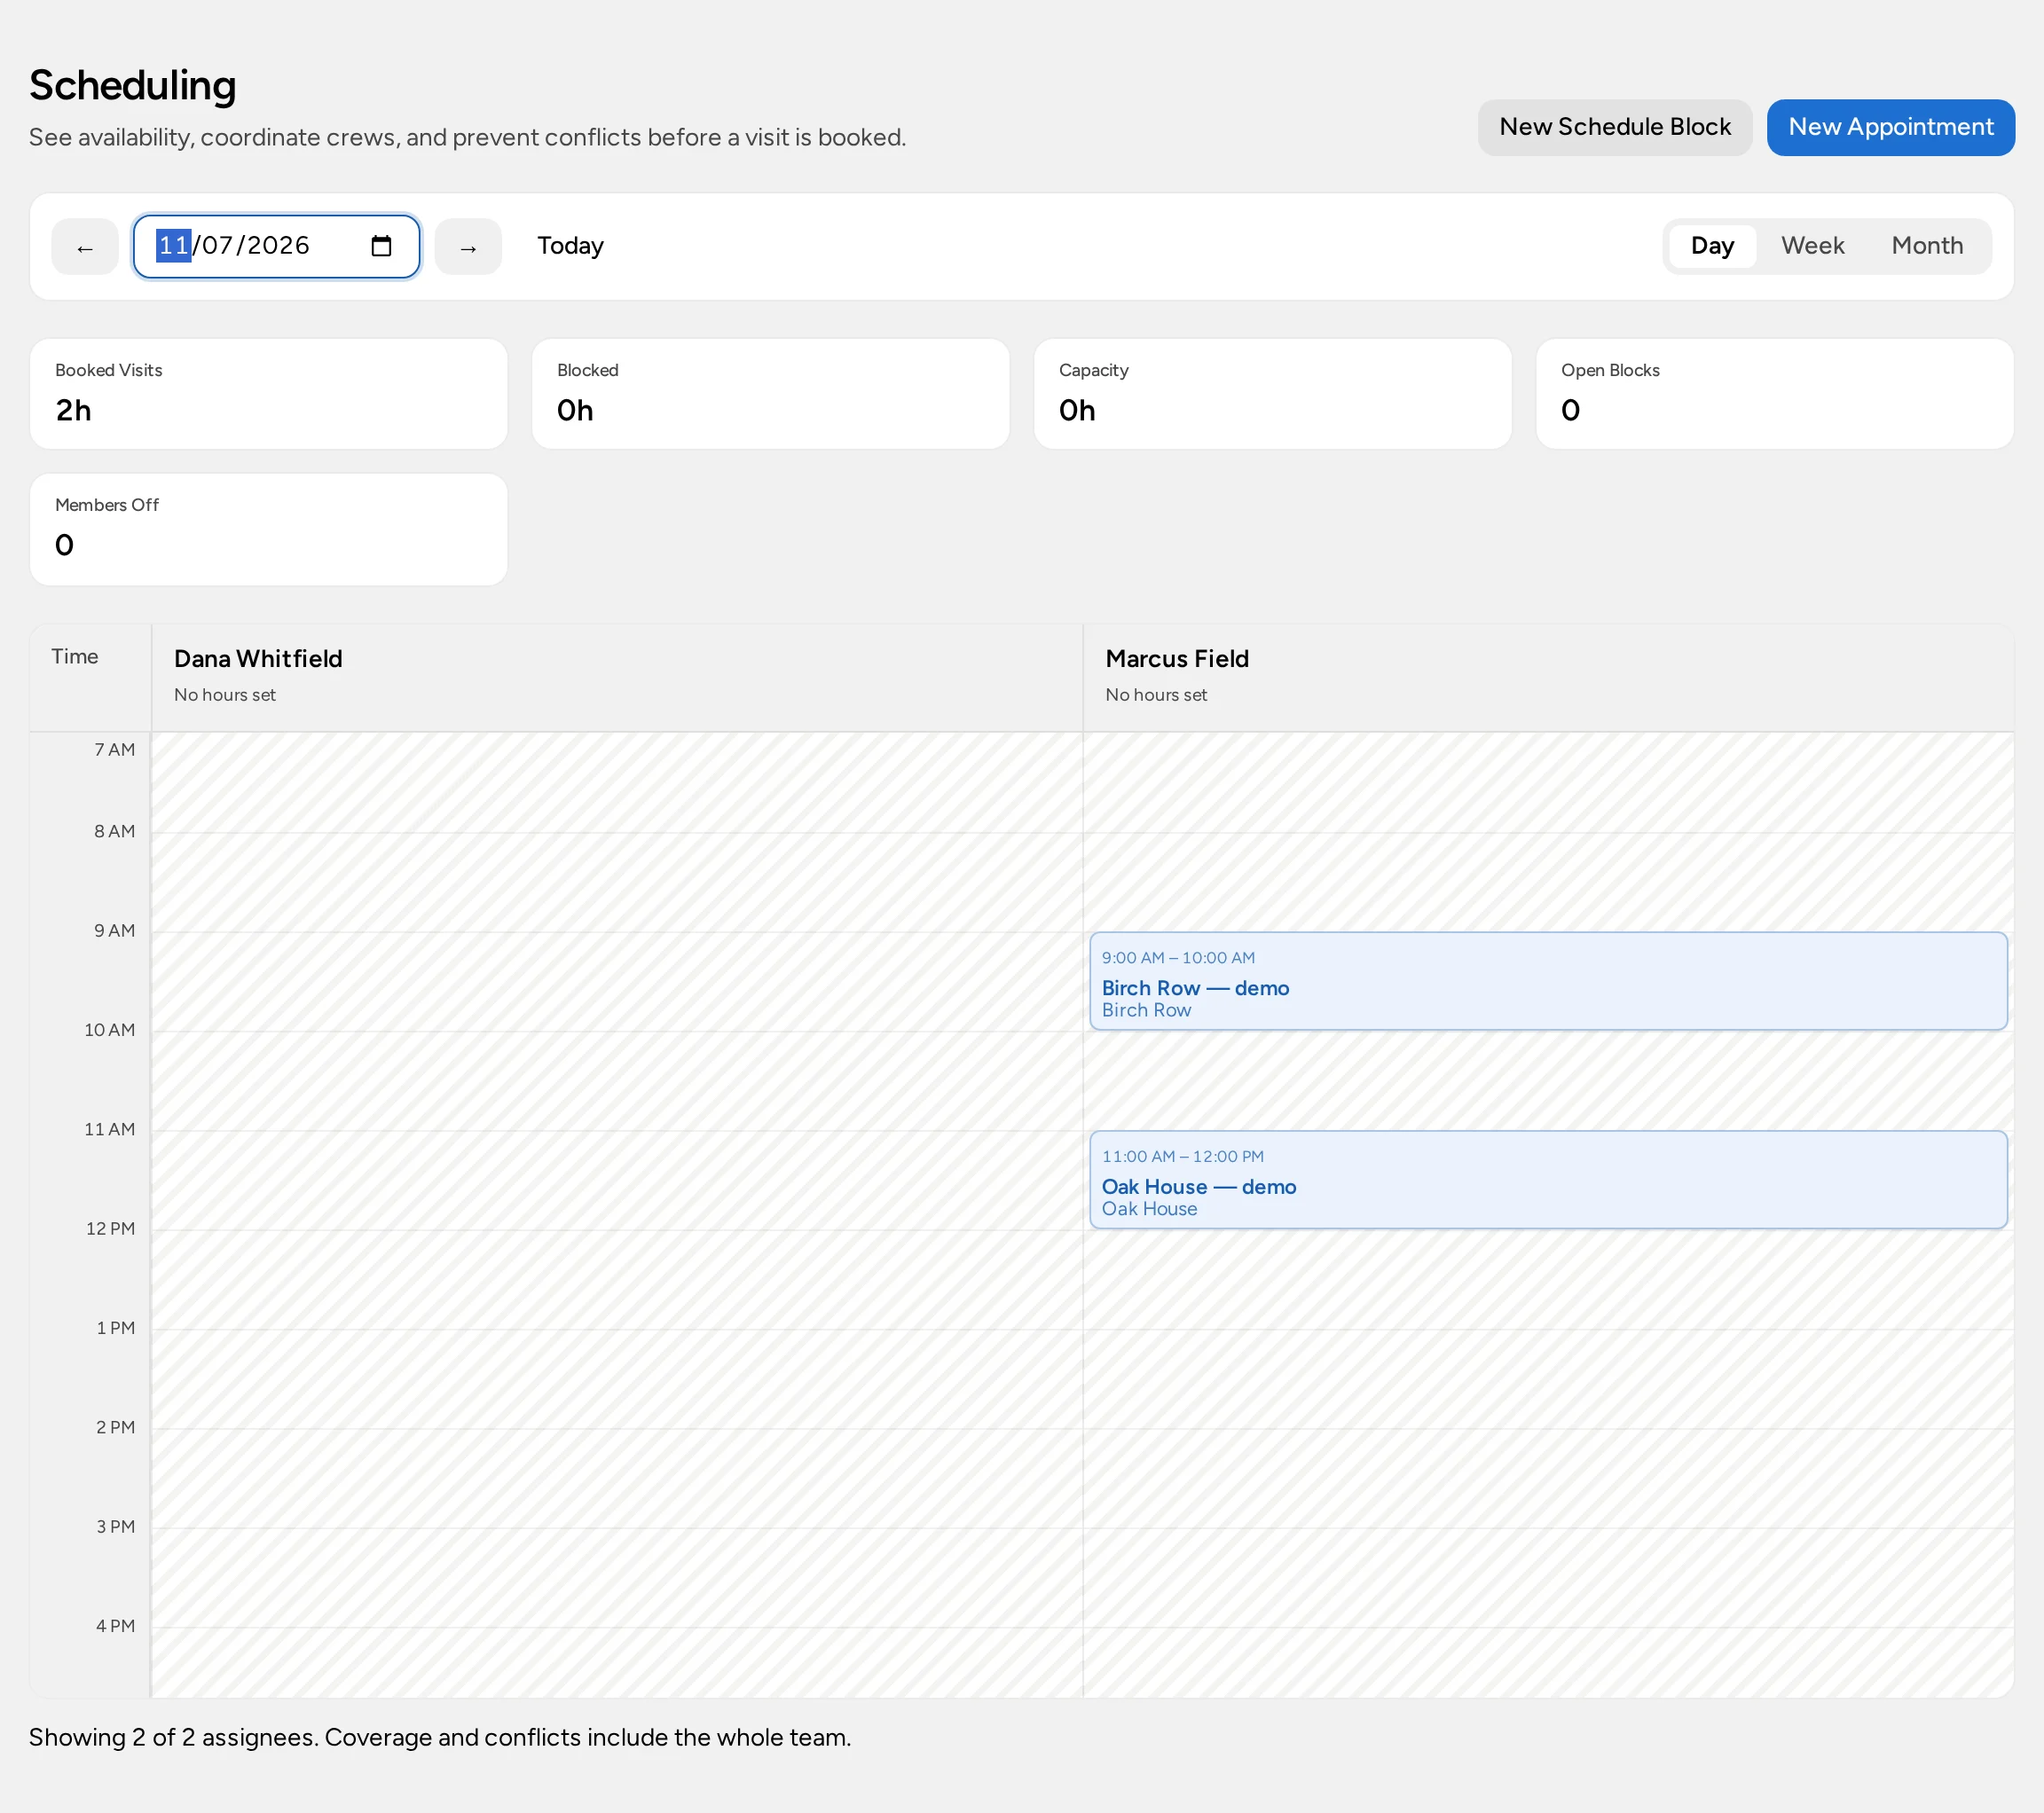
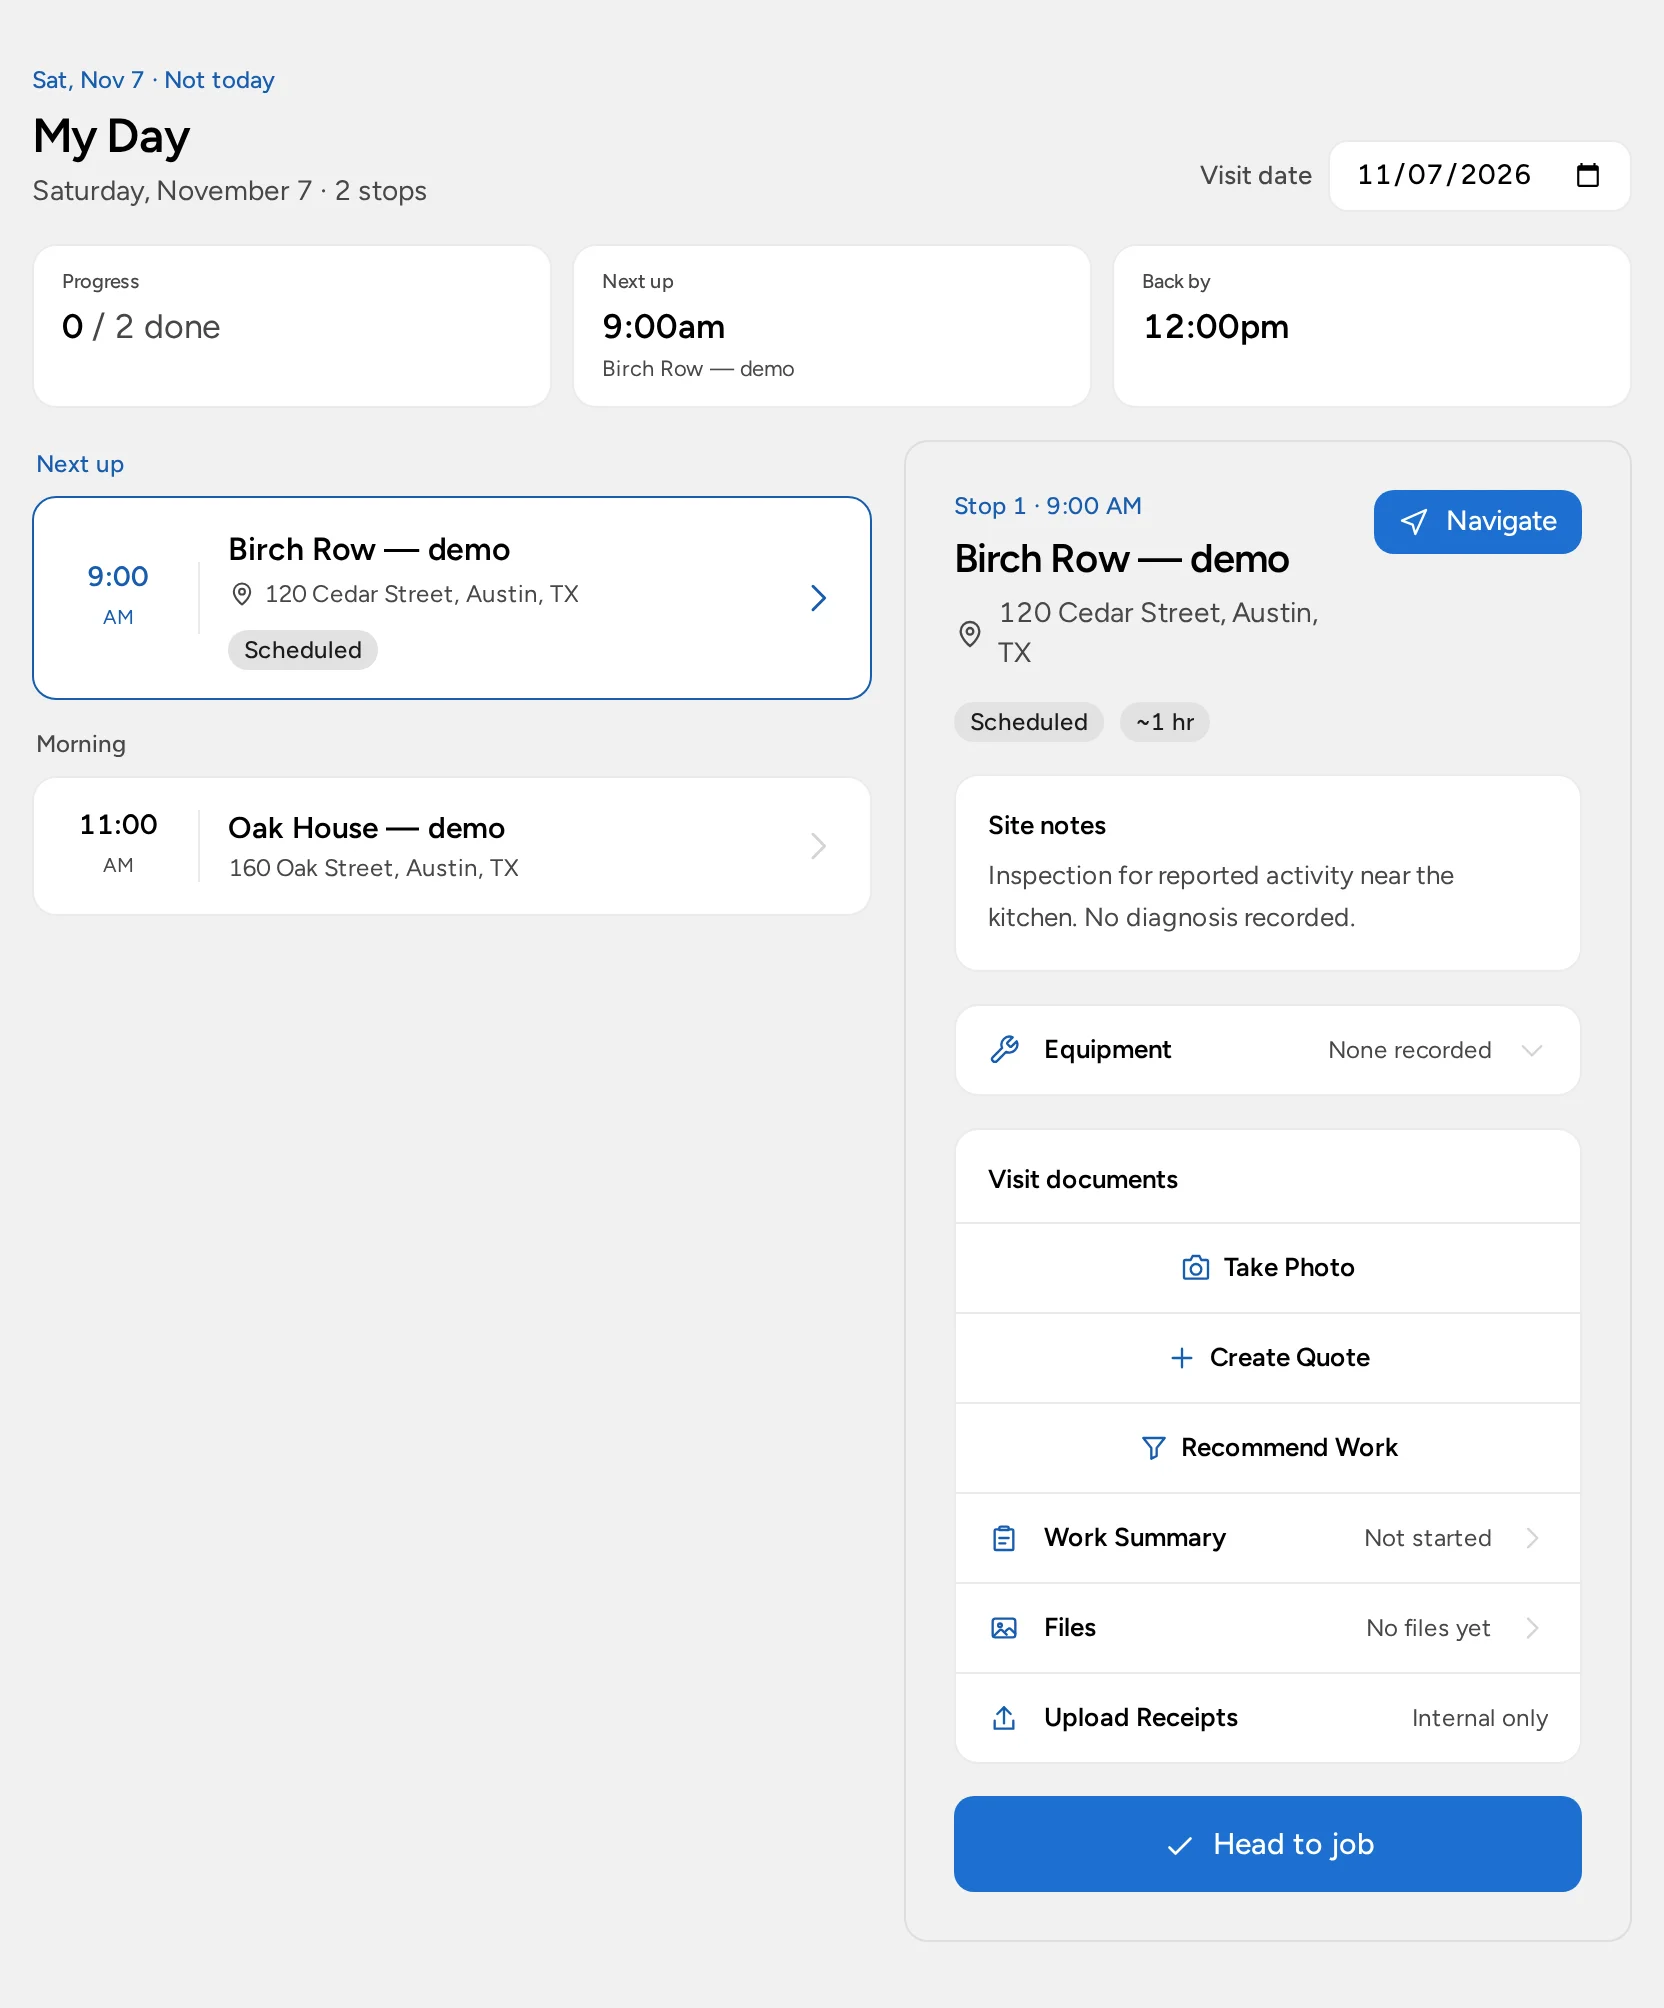
A solo operator using Self Scheduling can reserve personal time in My Schedule, but a block has no dispatchable customer-site assignment. With the add-on enabled, the Field Service experience lets an authorized scheduler book an inspection at a service location and assign a technician; that person checks My Day for the stop. The organization must select the experience and grant the relevant permissions. See choose your scheduling experience.
Field Service is an optional $20/month add-on per organization on Basic or Pro. The no-card Pro trial can include Field Service. Enterprise is custom-scoped: confirm Field Service in your agreement. Your organization must select that scheduling experience, and each person's role still controls access. Compare plans.
For example, inspect a multi-unit building’s reported kitchen issue before proposing a course of work. If another visit is agreed, book it deliberately at the correct unit or site. A saved appointment doesn’t automatically notify the customer; confirm access arrangements and timing directly.
Make the follow-up decision after inspection
Once the assigned technician has visited, review their findings through your own professional process. The scheduling record can tell the office what visit occurred; it doesn’t decide whether a treatment is appropriate or what products may be used. If work is proposed, describe the agreed scope and any return visit separately. Book a later stop at the correct service location only after there is a real date and eligible assignee.
An inspection at one unit doesn’t turn every unit in the building into a scheduled job. Check the address and access arrangements again for each visit, and confirm any customer-facing update directly. A completed inspection also does not issue a quote or mark the lead won by itself; update the lead and document status through their own actions.
For an ongoing service agreement, Field Service organizations can use Service Plans to record an agreed visit frequency and price for a customer site. Creating or editing a plan requires invoice-management access; schedule-management access can view it. Needs Scheduling helps the office find plans requiring a booking. Schedule each visit explicitly with the appropriate scheduling access, and create invoices separately. The plan tracks service visits owed under the agreement, but does not determine treatment intervals, book appointments automatically, or authorize automatic card charges. See service-plan setup for visit windows and booking steps.
Send a clear price and set up payment
If the customer needs to compare inspection, treatment, or follow-up scopes, prepare a proposal. Review the quote and issue the invoice only when the agreed scope and terms are correct. Marking a visit complete does not send it or record a payment.
To accept online cards, an administrator connects the organization’s Stripe account under Administration → Payments, completes provider setup, and selects an active income category. This is not the subscription card used to pay Opsentric. Staff can offer Stripe Checkout on a payable invoice or share its private invoice link; a Card (non-Stripe terminal) entry only records money taken elsewhere. Read the payment setup guide and check for provider-confirmed payment.
Keep field purchases in the books
Protective supplies, travel, and materials used during work are business expenses, not invoice payments. A field worker with upload permission can open Receipts → Upload Receipts without being able to view the ledger. A finance manager checks Needs Review and All to find the team’s files, verifies vendor, purchase date, amount, and expense category, then attaches the receipt to a purchase already in Ledger or selects Create Expense if none exists. Upload alone does not make an expense, and an AI-suggested amount still needs review. Follow the receipt guide.
Keep any treatment-specific application records in the appropriate regulated process; an Opsentric expense entry is only a financial record of a purchase. The app does not automatically map purchases to an inspection, treatment visit, or job-level margin. At week’s end, compare recorded purchases with statements and review unpaid customer invoices separately. A provider-confirmed invoice payment creates linked income; don’t record it twice.
Review what Opsentric does not store for you
- Add a fictional manager and one precise work site. Create a lead using only the reported symptoms and a follow-up date.
- Book an assigned inspection if your organization uses Field Service. Ask the technician to find the stop and site notes in My Day.
- Decide the next step after inspecting. If another visit is agreed, book it explicitly rather than relying on the lead or the first visit to create it.
- Prepare the proposal or quote for the agreed scope, review the invoice, and check the customer payment status separately from the visit.
- Upload a fictional supplies receipt and have a finance manager attach it to an existing purchase or create the expense once.
- Review open leads, receipts waiting on review, and unpaid invoices using daily business routines. Escalate an uncertain checkout result rather than recording a second payment.
Keep application records, product labels, safety sheets, required notices, licensing, and local reporting in the systems your work requires. This setup guide does not establish treatment intervals, efficacy, or legal requirements.