
Set Up HVAC Scheduling and Billing
A practical way to organize HVAC inquiries, site visits, and billing as your team grows.
Published
On this page
Starting an HVAC company involves more than getting a job onto a calendar. Someone needs to capture the request, confirm where the work is, decide who can visit, track what the business spent, and follow up on the estimate and payment. Opsentric can hold those business records together; it does not replace trade licensing, insurance, or your local compliance process.
Where HVAC work needs a clear handoff
- A no-cooling call and a replacement estimate need different next steps. Separate leads and follow-ups keep the callback visible while the larger estimate waits for a site assessment.
- The diagnostic visit ends before the work is resolved. Field Service gives the office a way to book and assign a separate return visit at the correct service location once scope and parts are confirmed.
- Parts cost money before the customer pays. Receipt review records supplier expenses, while invoice balances show what is still owed. Review both rather than treating a completed visit as a paid job.
Set up your organization before booking service
- Review business and financial defaults. Enter your business name and contact details, country, and Time zone. Confirm Organization currency, Starting number, and Padding width before creating the organization; currency and invoice-numbering choices are permanent.
- Choose the scheduling experience and responsibilities. Use Self Scheduling for personal blocks or Basic or Pro with the Field Service add-on for assigned site visits. Decide who handles dispatch, invoices, and receipt review using the first-workday checklist.
- Connect Stripe for customer credit card payments. After workspace creation, someone with settings-management access opens Administration → Payments and selects Connect With Stripe when available. Complete provider onboarding, check Accept customer payments and Receive bank payouts separately, choose an active Online payment income category, and select Save Income Category. Paying for Opsentric does not enable customer checkout. Follow the Stripe setup guide before offering card payment on a service invoice.
Begin with customers and service addresses
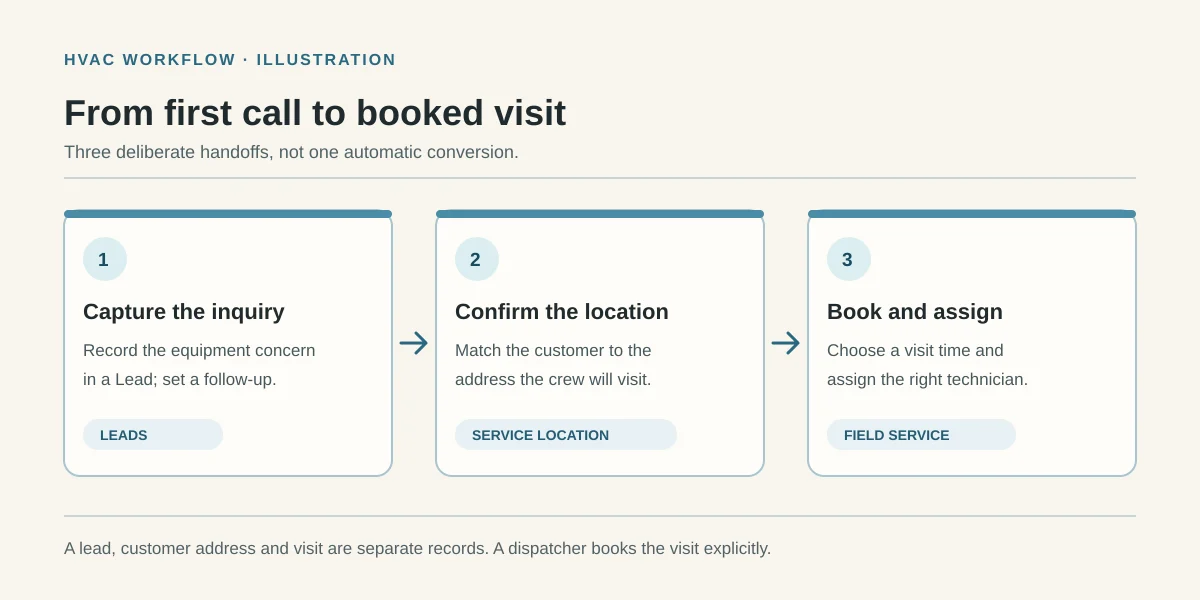
Create a customer record for the person or business requesting work. If they have more than one property, keep each service address with the right customer. That way the office can distinguish the billing contact from the place your technician will visit. See how to create a customer and service location.
For a new request, write down the equipment or problem in the lead notes rather than assuming the customer record alone describes the job. Confirm the address and access details with the customer before booking a visit.
Keep new inquiries moving
Use Leads to capture an incoming request, record what needs attention, and set a follow-up. A request for an estimate may need a site inspection before you can quote the work. Keep the lead open while you’re gathering details, then prepare a proposal when the scope is clear. The lead guide explains the follow-up workflow; the proposal guide covers the next step.
For example, a homeowner calls about uneven cooling. Capture their contact details and symptoms, arrange a visit, and follow up after diagnosis. Avoid promising a fixed repair price until you know what the work requires.
Choose a scheduling setup for your team
If you work alone and mainly need time for calls and estimates, My Schedule can reserve blocks of your own time. A block can reference a customer, but it is not a dispatchable service visit.
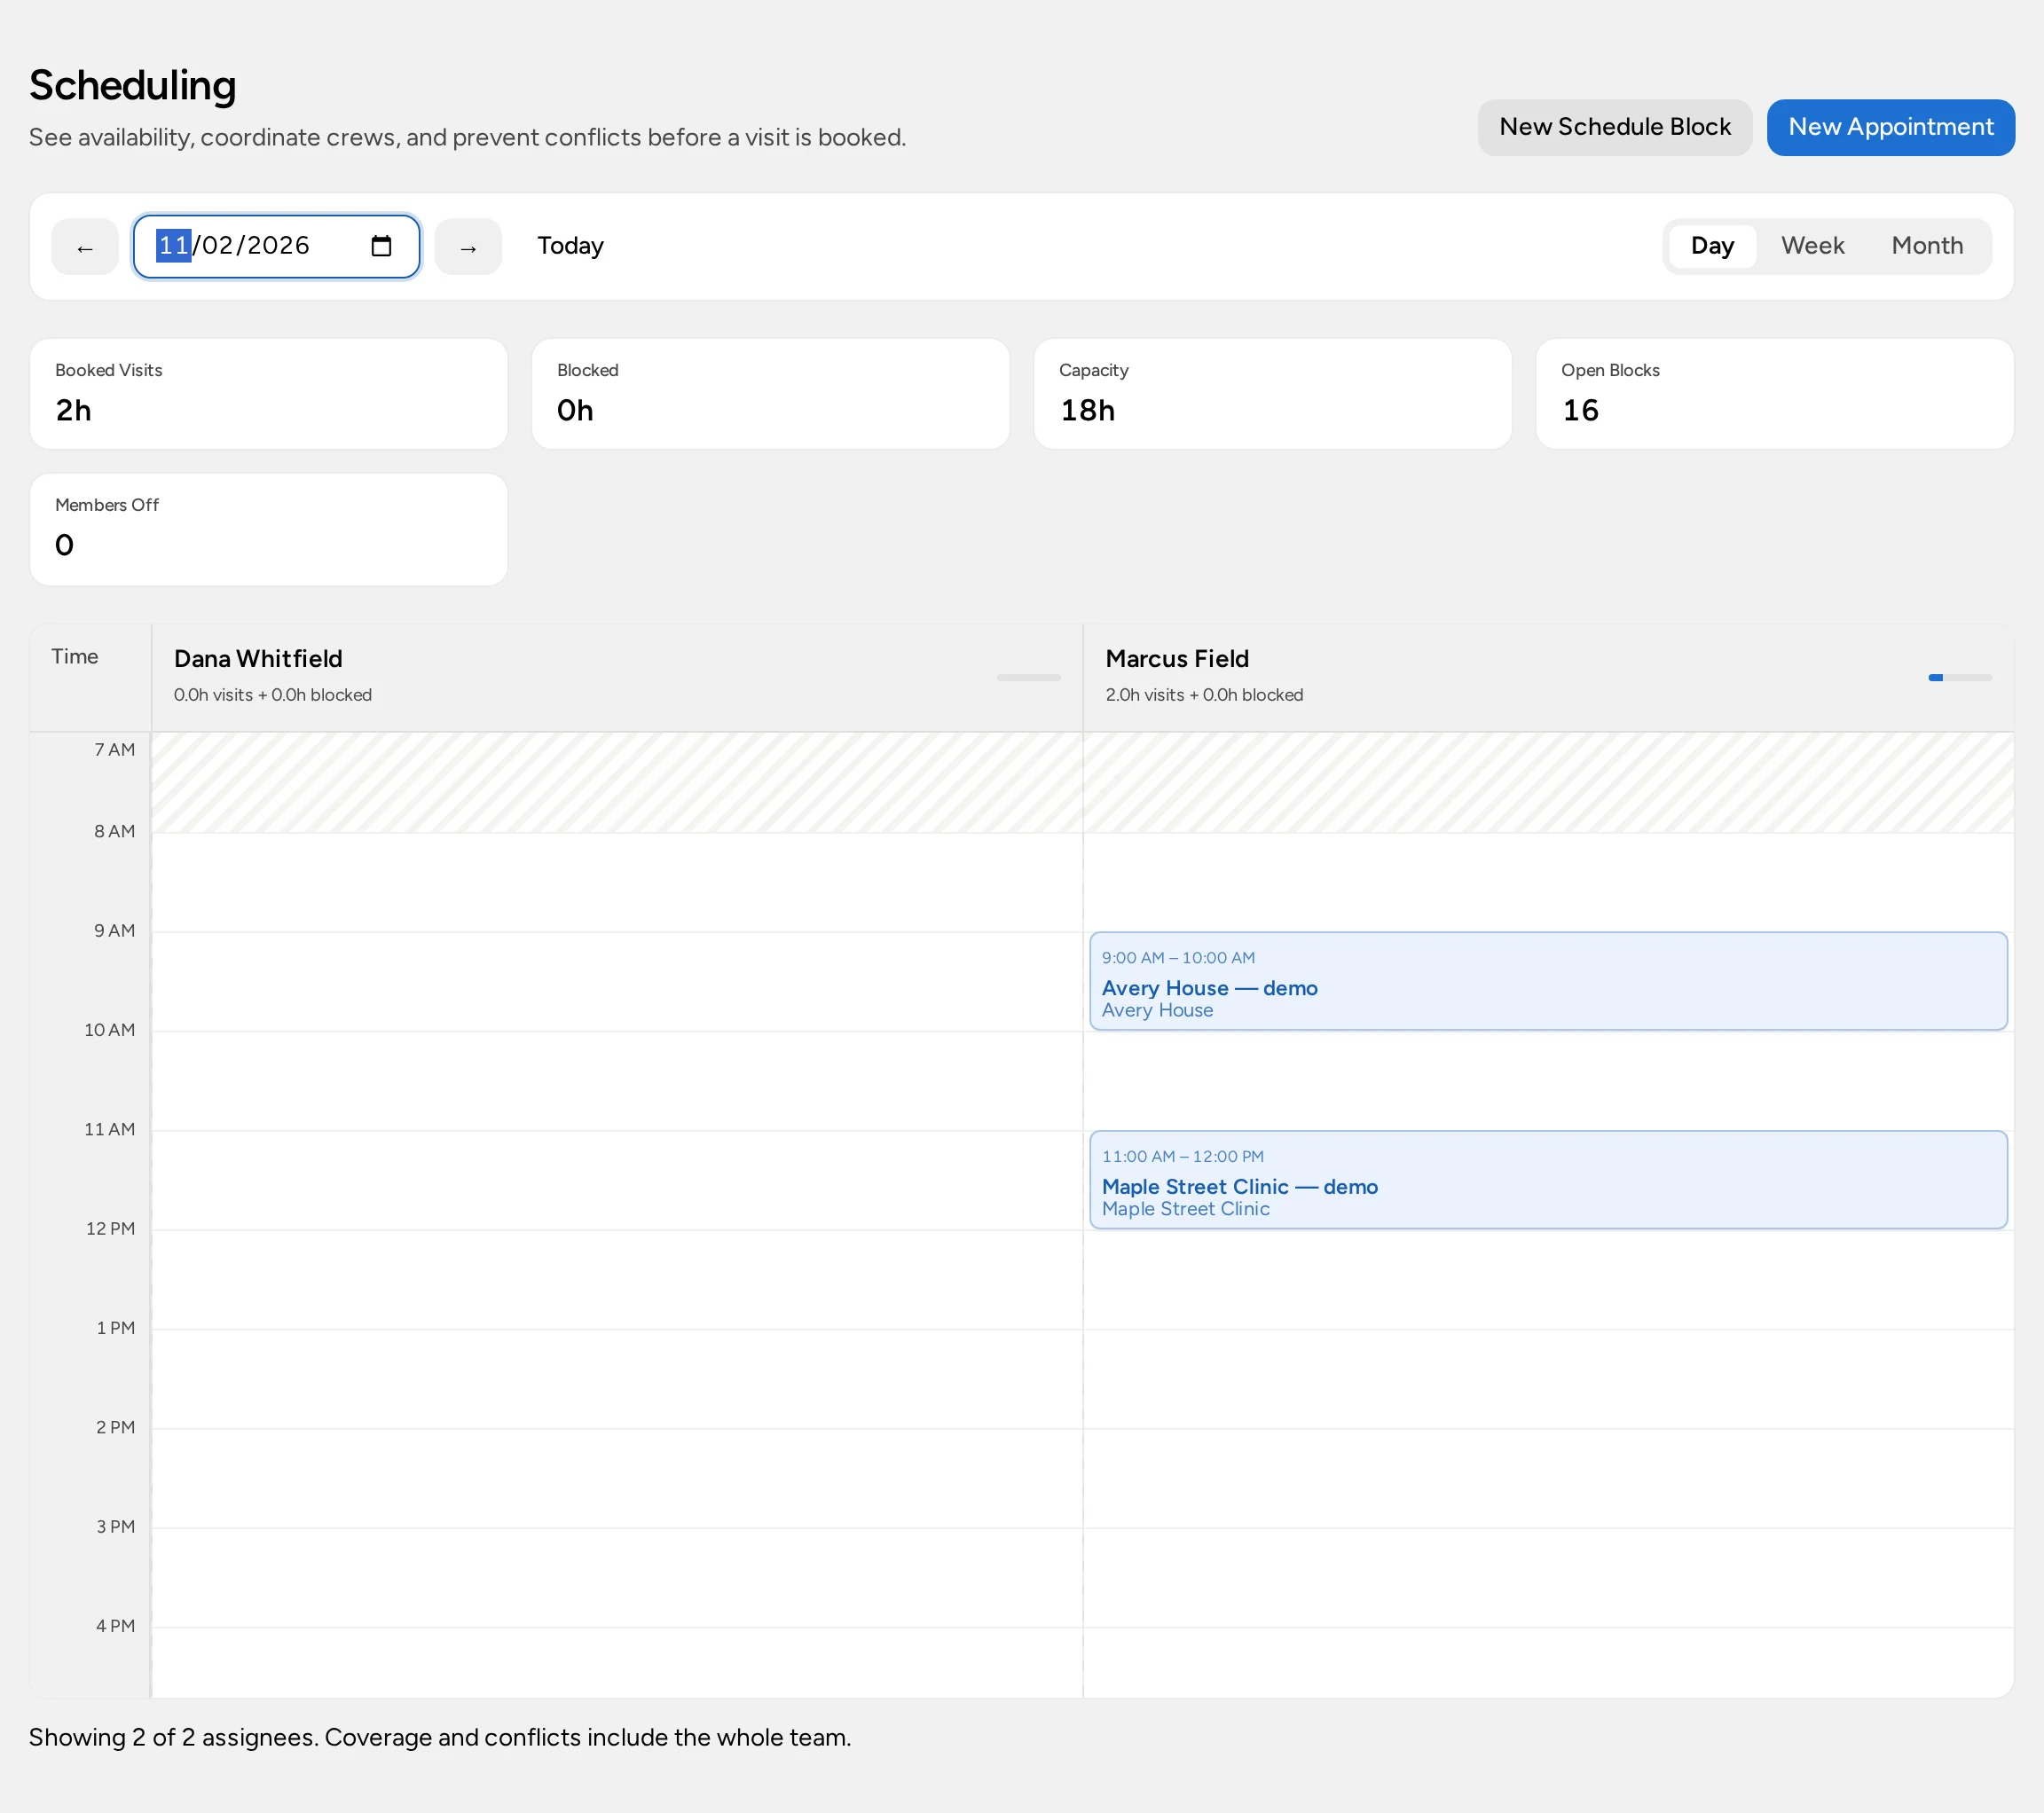
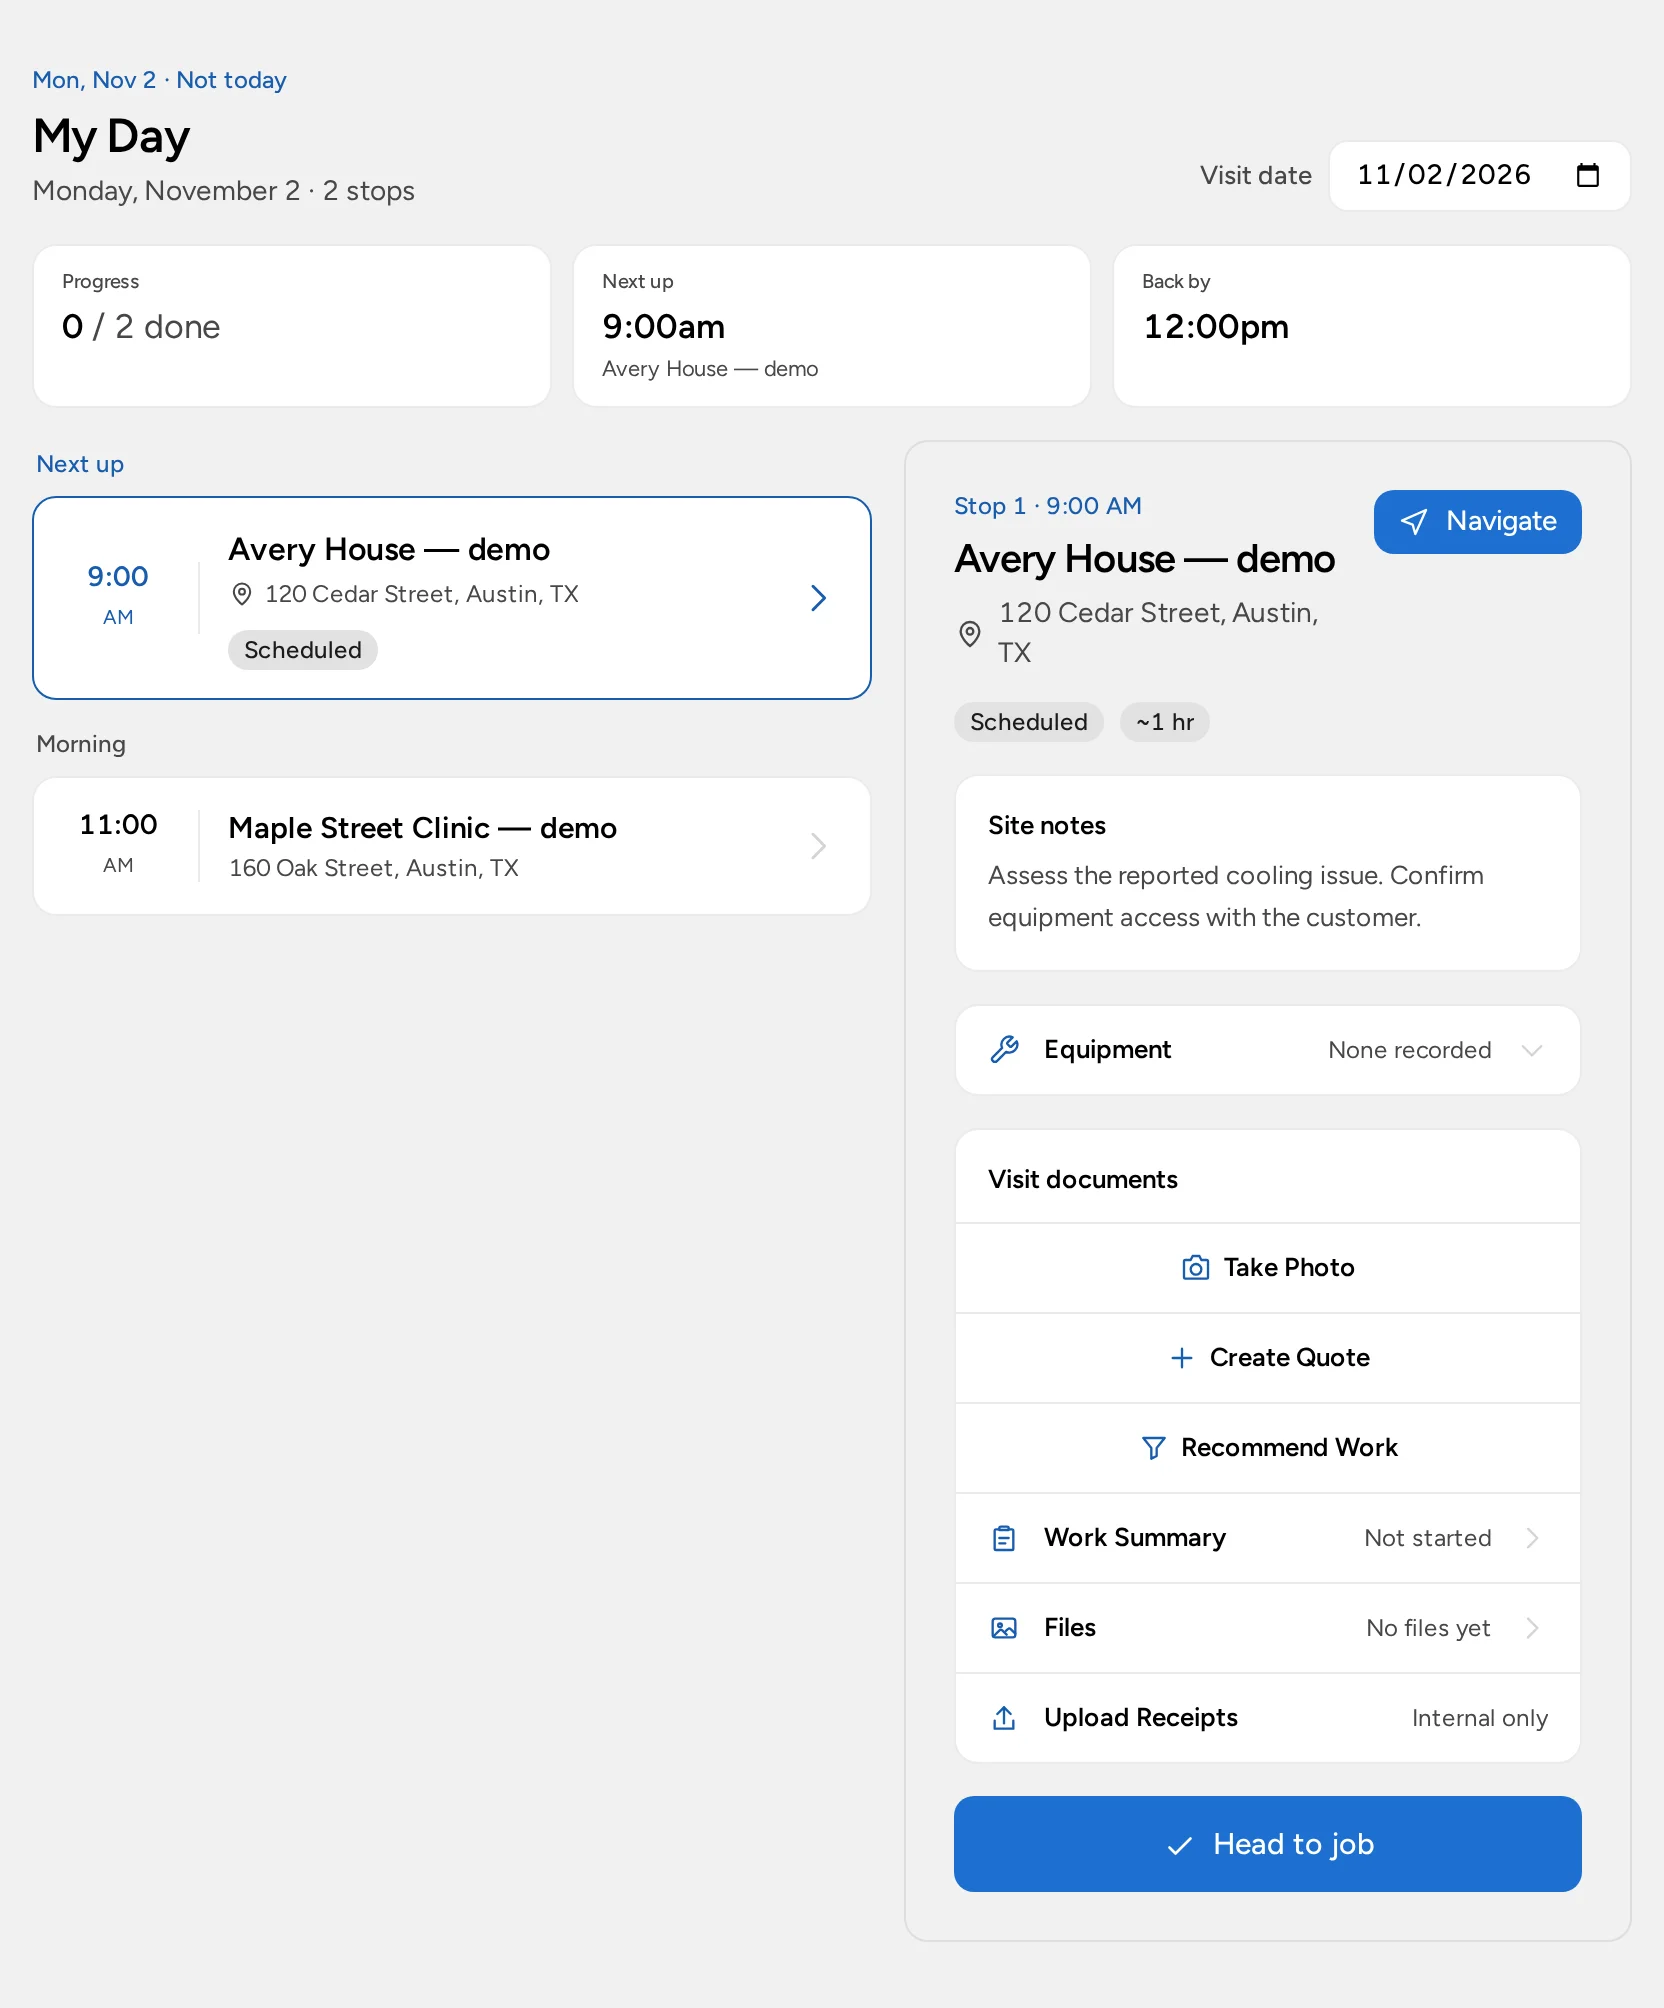
If you send technicians to customer sites, the Field Service experience lets a dispatcher book visits at service locations and assign people. Assigned workers use My Day to see their stops. Field Service is an optional add-on on Basic or Pro; your organization must enable that scheduling experience, and each person’s access depends on their role. See how the scheduling views differ and compare plans.
Start with a simple division of work: the office tracks requests and schedules visits, while the technician checks the assigned visit and records progress. Do not treat an unassigned calendar block as a booked technician visit.
Field Service is an optional $20/month add-on per organization on Basic or Pro. The no-card Pro trial can include Field Service. Enterprise is custom-scoped: confirm Field Service in your agreement. Your organization must select that scheduling experience, and each person's role still controls access. Compare plans.
Turn agreed work into billing
After the scope is agreed, use a proposal or quote for the work you plan to perform. Use an invoice for the amount you actually need to bill, then check its status separately from the visit. Completing a visit does not send an invoice or collect payment automatically. Follow the invoice and payment guide for the review and send steps.
Use site equipment records for the unit’s make, model, serial number, label date, notes, and photos. Keep refrigerant handling records, warranty obligations, permits, and required inspection paperwork in the systems and processes appropriate to your jurisdiction. This setup guide is about customer and work coordination, not a substitute for those records.
Set up card payments before offering checkout
Paying for an Opsentric plan is separate from accepting your customers’ cards. A user with settings-management access opens Administration → Payments, connects the organization’s Stripe account when available, completes the provider’s onboarding requirements, and saves an active Online payment income category. Check that the account can accept payments; connecting it alone is not enough. Follow Connect Stripe for Customer Payments for the setup and readiness checks.
For an approved or otherwise payable HVAC invoice, staff with invoice-management access can offer Stripe Checkout through Collect Payment, or share the private customer link for Pay Invoice. The customer enters their card details with the provider, not in Opsentric notes. Wait for provider confirmation and check the invoice balance before recording anything manually. Card (non-Stripe terminal) only records a charge taken elsewhere.
Keep parts and operating expenses accounted for
A replacement job may involve a purchased component, fuel, and small supplies long before the customer pays the invoice. Keeping receipts in a van or inbox makes it hard to see what the business spent that week. In Opsentric, the purchase belongs in the expense ledger; the customer charge belongs on the quote or invoice. These are separate records. Uploading through My Day → Upload Receipts associates the receipt with the service visit, but finance must still review it. Opsentric does not automatically allocate costs or calculate profit by job.
After buying supplies, open Receipts → Upload Receipts. An uploader can save the file, but that alone does not record an expense. A person with finance-management access should review the vendor, date, amount, and expense category. If the purchase is already in Ledger, attach the receipt to that transaction; otherwise use Create Expense from the receipt review. Check the resulting transaction before entering the purchase again. The receipt and expense guide covers duplicates, manual review, and the access split.
At week’s end, compare the expense records with your purchase statements and review unpaid customer invoices separately. An invoice payment creates linked income when confirmed; don’t create another income transaction for the same receipt of money. See daily business routines for a finance review that fits alongside dispatch.
Try a first-week workflow
- Add a test customer and the address where service will take place.
- Record an inquiry and a date to follow up.
- Choose My Schedule for personal time blocks or Field Service for dispatchable customer visits.
- Prepare a proposal or quote once the scope is known; send the invoice separately when ready.
- Upload a fictional parts receipt and have the finance owner attach it to an existing expense or create one—never both.
- Review open leads, unreviewed receipts, and unpaid invoices at the end of the week. The daily routine guide can help you decide who owns each check.
This is a starting workflow, not a prescribed way to run every HVAC shop. Adapt it to your crew, customer agreements, and local requirements.